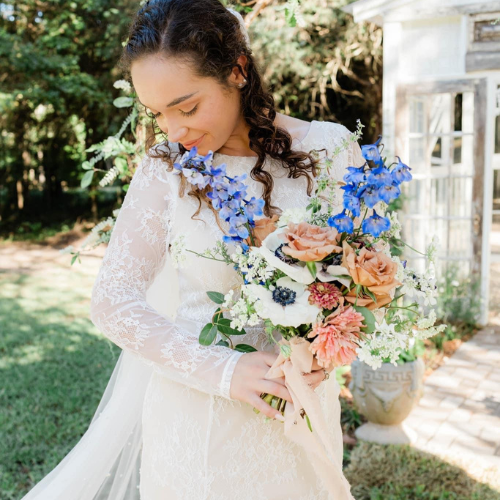
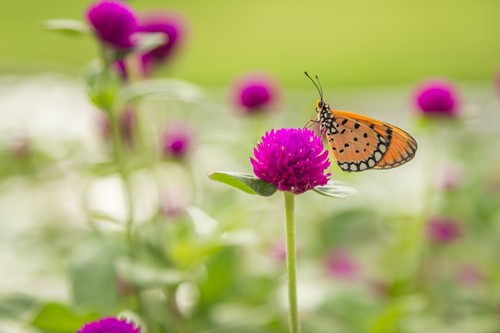
Learn to Grow Your Own Bouquet!

How to grow a cut flower garden in East Texas. The secret is choosing flowers that flourish in humidity & heat.
Growing flowers in the long, humid summer of East Texas has it’s own set of challenges that differ even from other areas of the South. Our summer nights are very warm, in addition we often experience serious pest and disease pressure as a result of the humidity. If you have tried in the past and failed, get your garden gloves ready because this year you are going to grow more flowers than you can imagine!
When to start seed: The flowers discussed here should not be started before March 10th. Our last frost is usually around March 15th. If you start seed too early your transplants will become leggy or stunted as they wait for the temperature to consistently be warm enough for planting outdoors. These flowers are easily started from seed and bloom throughout our hot, humid East Texas summers. They take full sun with the exception of vining tomato, which can benefit from a little shade in our hottest afternoons of July and August.
My #1 seed-starting tip: use a heat mat for your seed trays. Cold, moist soil can harbor disease that may reduce your seed germination success. Warm your seed trays with a soil mat (your household/medicinal heating pad is not the same thing and will cook your seed.
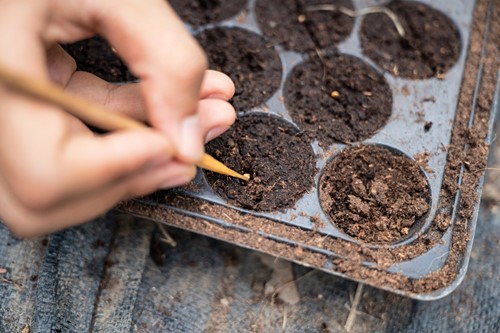
Seed starting success: Start your seed in trays or soil blocks. I use soil blocks almost exclusively. Soil blocks practically eliminate any transplant shock because the plant's roots are gently set into the garden soil without being removed from a cell tray. My soil blocks are made in a propagation tray with a soil heat mat beneath it until the seed germinates. I use the 1020 greenhouse flats to bottom water my seedlings.

Seed trays with seed starting cells work fine, just be very careful lifting the seedling out when it’s time to transplant. The seed trays I've shown above include a humidity dome to improve germination. When sowing tiny seed use a toothpick or sharp orange stick (buy them in the nail section of the beauty supply store) that is moistened with saliva. Your saliva is sticky and a tiny seed will stay on the tip until you place it in the center of your seed cell. Be sure to read your seed packet. Some seed require light to germinate while others may need to be cold stratified prior to sowing. I use vermiculite to lightly cover seed that require darkness to germinate. Vermiculite inhibits soil bacteria that can cause dampening off. I like Jiffy seed starting mix if I’m not starting very many seed otherwise I mix a very fine sifted peat mixed into Miracle Gro potting mix. I’ve tried cheaper mixes than Miracle Gro however less expensive mixes have large chunks of wood and even occasionally trash! Yuk. Because I use a soil blocker I add extra peat to help the block absorb more water and pack well. For seed trays with cells I would just fill them with the potting mix. I use Vermiculite to cover my seed (see above). Some folks mix their own seed starting mix with a ‘recipe’. I don't have time for all that mixing and measuring, a quality potting mix works just fine for me.
Once the seed has germinated I remove the heat mat and ensure the tray is 3-4 inches from the light source. My lights are LED shop lights.
For seed that require light to germinate (celosia for example) I gently sprinkle vermiculite around the seedling within a few days of germination to protect the seedling from dampening off. Do not cover the seedling. To water seedlings always fill the flat germination tray and allow your soil blocks or seed trays to wick the water up from the bottom.
Spraying or pouring water on top of tiny seedlings can damage them or create an environment for bacteria. Always bottom water your seed trays. Using room temperature water or water slightly warmed by the sun can prevent the shock caused by using cold water.
Cold, wet soil creates an environment for bacteria and fungus which will lead to poor seedling development. Once your seeds have germinated, plan to move them to a spot in your garden within 3-4 weeks.
Less for Zinnia or Sunflowers, these should be transplanted as soon as two actual leaves appear above the initial cotyledon leaves.
Transitioning to the garden: When your seedlings are 3-4” tall begin hardening them off in preparation for transplanting to the garden. Set them in a location with filtered sun or dappled shade for an hour the first day. On day 2-3 leave them out a little longer, 2 hours or 3 just be sure they are not in the direct hot morning sun.
By day 5 they can be left out 4-5 hours in a dappled shade or filtered sun location. Avoid leaving them out in the afternoon when the temperatures in April in East Texas can reach the mid 80’s. Slowly introduce the seedlings to the sun in the early mornings and be sure to water them from the bottom of the tray if they seem dry outdoors. The wind and outdoor environment is a lot harsher than they are accustomed to.
I work full-time away from home. If it seems you are a slave to seedling trays during this transition time please know it is easily adjusted to fit your schedule. I set my trays out in the late afternoon when I get home from work. The heat of the day is past and the late afternoon is cooling down. I have a pine tree next to my potting shed with pallets beneath it to set the trays on. The dappled shade from the tree and the setting sun is very similar to the same environment the seedlings would experience in the mornings if I were home.
Let’s talk about which flowers to grow
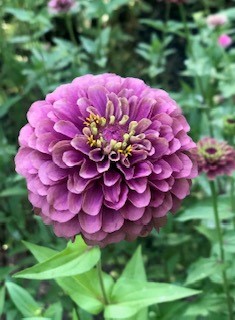
Zinnia – I recommend the Oklahoma series because they were developed for cutting. They bloom repeatedly which means you don’t have to succession start seed as often for a long harvest season. They bloom in a rainbow of colors and are perfectly sized to play well with other blooms in a jar or vase.
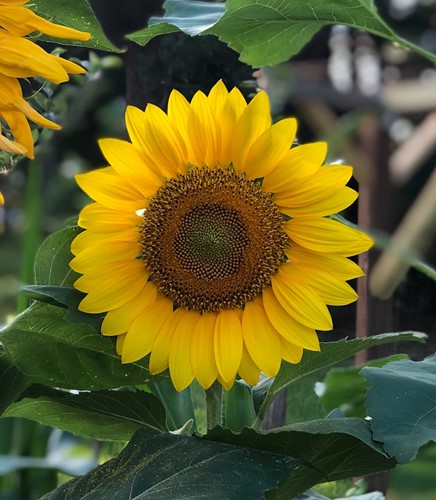
Sunflower –There are so many varieties! However, there are a few varieties more suited to cutting and enjoying indoors. The Pro-cut and Sunrich series do not produce pollen and if you space them 6”-9” apart you will have a smaller bloom that is easier to position in bouquets. Start your seeds 2 weeks apart for 6, 8, 12 weeks; however long you want to have succession blooms. If you plant them all at the same time, they will bloom at the same time.
Gomphrena - There are so many varieties of this filler flower if you have the space try several. I particularly like QIS Formula Mix and Strawberry Fields. This flower dries beautifully!
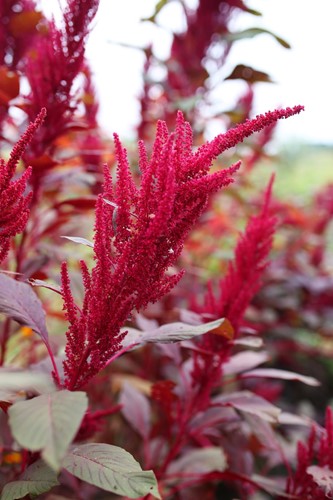
Amaranth - ‘Hopi Red Dye’ and ‘Emerald’ varieties are my favorite. This grain adds drama to summer bouquets.
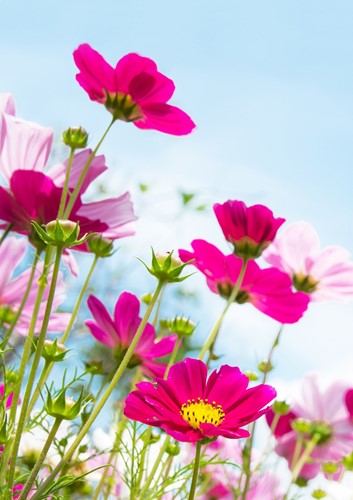
Cosmos - Cosmos may start slow, however once it starts blooming you will fill buckets. I love Versailles, Rubenza and Afternoon White. The double click varieties have a double row of petals that look like cupcake papers.
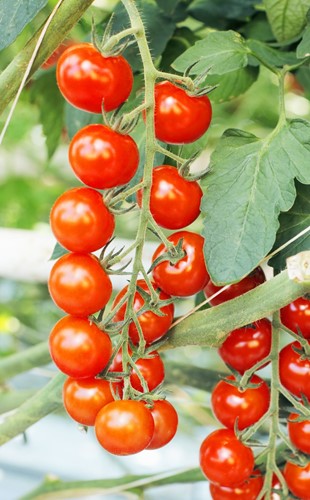
Super Sweet 100 Tomatoes - Yes, I know this is a vegetable (ok, a fruit technically!) but it is beautiful as a spiller in a rustic flower bouquet. I plant it every summer in large hanging baskets. Give it a little protection from the hottest western sun in the afternoon and evening.
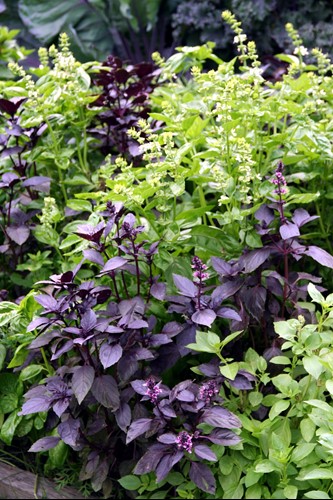
Basil - There are so many varieties of basil I try to grow a new one each year along with my tried and true favorites; Aromatto, Dark Opal and Cinnamon. Aromatto and Cinnamon add fragrance as well as beauty to bouquets.
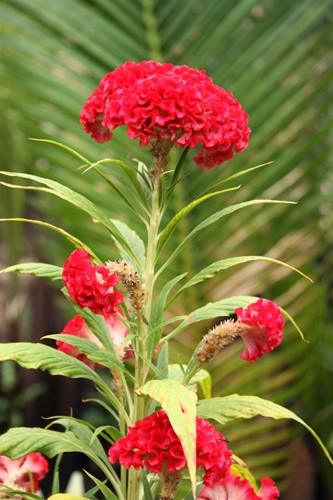
Celosia – ‘Chief Mix’ and ‘Neo’ series do well in our hot summers and will bloom until a killing frost. I always grow ‘Pampas Plume’ mix as well. This year I plan to add ‘Sunday Gold’ for a richer yellow. Both varieties are beautiful in bouquets.
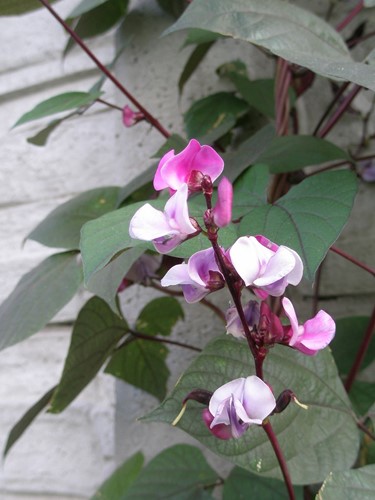
Hyacinth Bean – ‘Ruby Moon’ needs a strong trellis or arbor. Expect beautiful magenta blooms, trailing vines and deep purple bean pods for texture in your summer bouquets.
Rudbeckia ‘Indian Summer’ - Technically not an annual. Sow seed in 2” pots in late August or September to give them several weeks of warm weather for root development. In October re-pot them in a 6” pot and place under an eave or porch so they don’t get too much rain (wet, cold soil will increase the risk of a fungus that causes damping off and other soil borne diseases). This plant will give you buckets of blooms from July through September the following summer.

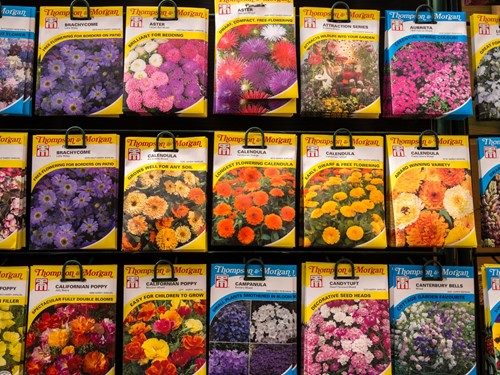
Where to purchase your seed? Seed displayed in carrousels and sold in big box stores may be old and have a low germination success rate. There are many quality seed suppliers on the internet. I can attest to the ones I have actually ordered from and had success. For me, seed starting success is 70% or more seed germinated. Whether or not the seedling lived to be a transplant in my garden is limited to my expertise. Here are my go to sources for quality seed: Johnny’s Select Seed, Harris seed, Swallow-tail Garden, Floret, Renee’s Garden, Burpee & Baker Creek.
When to purchase seed: The first week of January, everyone is still in a food coma from Christmas and New Year celebrations.
Not serious flower gardeners; we are studying seed catalogs and daydreaming of the garden we are planning. Get your seed order placed as soon as possible in January. Procrastination will leave you with leftover options and the variety you had your heart set on will be sold out. When your seed arrive, store them indoors out of direct sunlight.
I separate my seed packets according to the date I plan to start them. Writing the date on the top packet and using a binder clip to hold them together helps keep me organized when it is time to start spring annuals. For example; I start celosia and basil earlier than zinnias and sunflowers. You will not start any of the seed listed here before March 10th (with the exception of Rudbeckia which is ordered in August or September for fall planting). Don’t worry if you didn’t get your Rudbeckia started in the fall. Order it as well and start it in the spring. It may bloom later and for a shorter time the first year. It will bloom larger and longer next year. Gardeners always have something to look forward to!
Read the seed packet, research if it needs light to germinate, and get growing!
Questions or have a tip to share? We welcome your email or Facebook message and try to answer questions promptly.
Download the FREE 24 page digital garden journal! {Click the image below} This is a free download you can print at home or at a local office supply store. Even a few brief notes in a journal can maximize your garden successes and minimize failures. Journal what worked best for certain pests, wildlife you observed and any beneficial insects inhabiting your garden.

Happy Gardening Friends!
