Tips on Growing with Soil Blocks
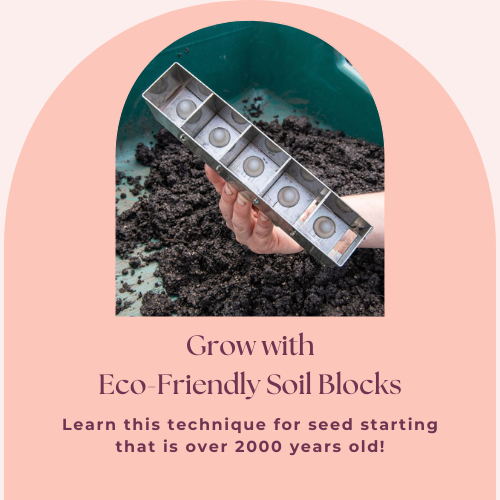
Soil Blocking: An Eco-Friendly Way to Start Seed (and save space!)

Soil Blocking is an old (like over 2000 years old!) method of seed starting. The Aztecs are the first culture to have used the technique. Soil blocks use air to prune the roots as the seedling grows. But let’s start at the beginning. Soil blocking is great for indoor seed starting when it’s too cold to plant in the garden. It also saves space and reduces the amount of soil needed for each seed in relation to a typical seed tray. Soil blocking is eco-friendly too. It can reduce or even eliminate the need for plastic pots or trays for the home gardener.
I use the small 3/4" for tiny seed and seed that require light to germinate
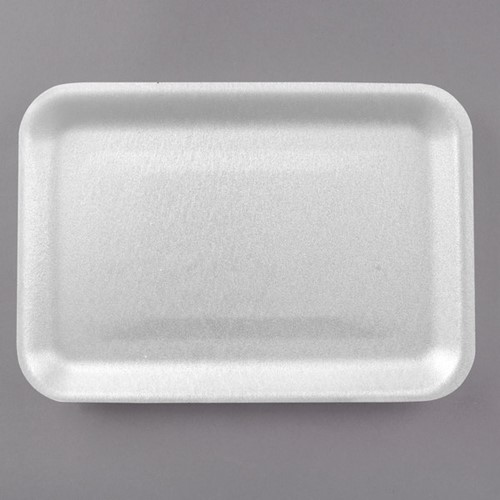
The soil blocker compresses the soil mixture into a firm block that usually has a small indention for the seed. I especially like soil blocks for seed that require light to germinate. Snapdragons, strawflower, celosia, foxglove, chamomile are all seed that require light and are also SUPER tiny. I can start 20 foxglove in a small foam meat tray that’s been washed and saved to be re-used a seedling tray.
Keep reading to watch a short video of me making soil blocks.
You could also buy these heavy duty trays but I like to repurpose items and the small food trays are easy to manage a smaller number of seedlings.
There are lots of recipes for soil blocking mixtures. I purchase a pre-made mix for seed starting and add a ½ cup of work castings to a 2 gallon bucket. I’ll share a recipe I have used in the past. For me it’s easier to just buy a couple bags each season.
Be sure to moisten your soil. You’ll have to practice a bit to get just the right amount of water. Too thin and obviously the soil will not compact in the soil blocker to make the block. Too dry and it will fall apart as you depress the top ‘plunger’. Your moist soil mix should hold together in a ball when you squeeze a handful.
Once you have the right consistency of moisture and you’re ready to begin soil blocking gather your supplies. You will need seed trays, the seed you plan to grow, a dish to hold your loose seed, a toothpick and popsicle sticks or plant labels to help identify what you planted in each tray.
Determine how many seed you will plant and how many blocks you need. Did you make mud-pies when you were a kid? Simply give the soil blocker a gentle twist and push it down into the soil. Don’t depress the plunger on top. Push the blocker down into the soil and ‘smoosh’ it around. You want to pack the block sections really full of soil. Turn it over and inspect it. Are they all full and packed tight? No? Repeat the process. ‘Smooshing’ and gently packing the soil into the blocks. Ready? Set the soil blocker on your tray. Hold it firmly down for a second then lift slightly and depress the plunger. The blocks should slip right out. You have a set of blocks ready for seed. I make all the blocks I intend to use before I start seeding.
Using a toothpick moistened on the tip of my tongue, I carefully lift one seed at a time from a small dish. The seed is deposited in the center of each soil block. Your ready to put your tray under the grow light. Keep a spray bottle filled with water to gently mist your seed for the next few days. To bottom water - gently add water to an empty corner of the tray until a small amount of water has surrounded the soil blocks. Depending on the size of your tray it can take ½ to 1 cup of water. You want to avoid adding too much water or your blocks will fall apart. Only add as much water as the blocks can absorb in about 10 min.
Are you using a humidity dome? Covering seed while they are germinating increases success by keeping the environment moist and warm.
A heat mat can also increase your seed germination success. Heat mats are designed to warm the soil 10 degrees above the ambient temperature. A home heated to 73 degrees in March is too cool for seed to successfully germinate. Keep in mind, soil blocks warm faster than large seed trays. Monitor them for extra water needs. Once ⅓ of your seedlings have germinated, remove the heat mat.
Once your seedling has 3-5 true leaves you can start hardening them off. The initial green leaves that appear immediately after germination occurs is called a cotyledon. This are embryonic leaves whose purpose is to provide nutrients to the developing plant embryo. True leaves resemble the look of the adult plant. Watch for true leaves before you begin to harden off seedlings in preparation for transplanting outdoors.
I hope you will give soil blocking a try. It’s fun, eco-friendly and a great space saver for starting seed indoors in late winter. Email me any questions or tag #easttexasflowerfarm in your soil blocking posts on social media.